Managing Controls
Track, organize, and manage control implementation and evidence.
Getting Started - Managing controls
Managing controls in DISPulse gives users unparalleled visibility into their compliance status and obligations.
To get started, navigate to the Policies & Controls page under the Compliance tab.
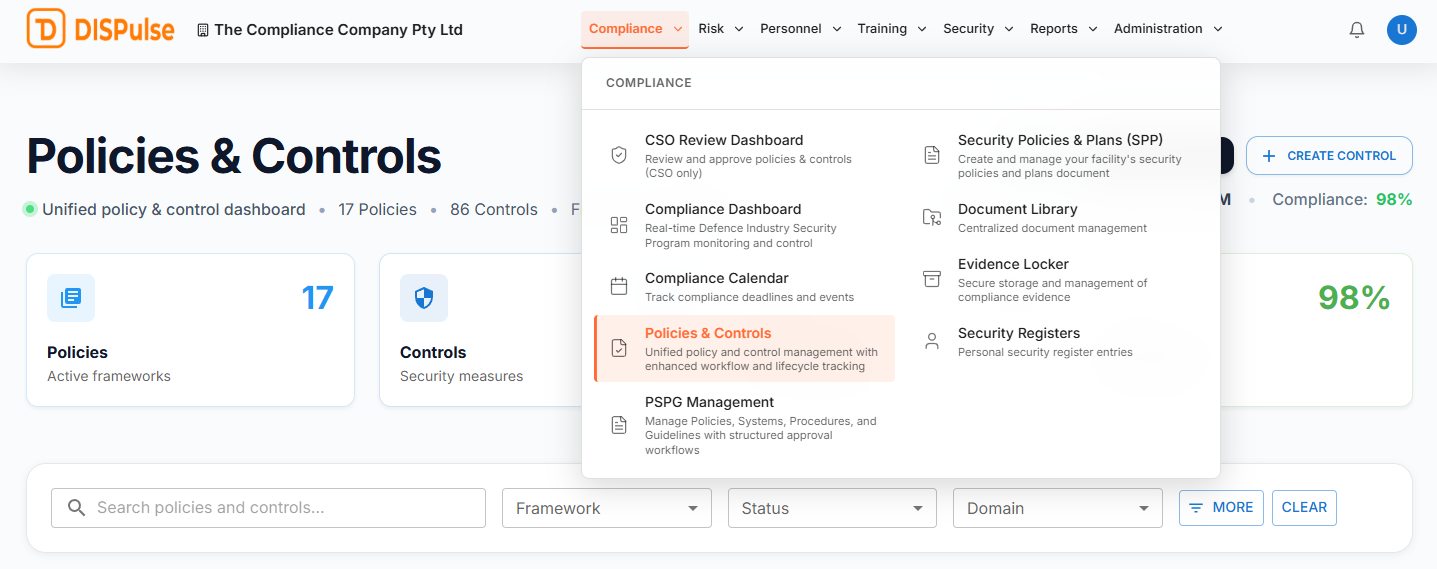
Now that you're on the Polices & Control page, scroll down to the Unified Control & Control View and find the Control you wish to manage.
To help you find the proper Control, use the search bar or filters to refine your search. The filters are Framework, Statue and Domain.

Once you've found the Control you wish to manage, either open the control card by simply clicking the control if you're using the default compact Unified Control & Control View or click the view details button if you're using one of the other view densities.

Control card headers include several buttons to help users manage their controls in DISPulse. From left to right: Edit Mode, Update Status, Evidence, Schedule, and Export.
Edit Mode: Enables users to edit Control content. In edit mode, users can edit the Control title, description, and body content. To ensure all Control content changes are saved, click the Save Content button at the bottom of the content tab. Users can tell they are in edit mode by reviewing the button's blue colour, and the text has changed from EDIT MODE to VIEW MODE.
Update Status: The status update button updates the implementation progress and subsequent timeline events.
Evidence: The evidence button is a shortcut to the Evidence & Testing tab.
Schedule: The schedule button is a shortcut to the Schedule tab
Export: The export button exports your Control content into a formatted Word document.

Control Detail cards have 6 tabs, from left to right: Overview, Content, Implementation, Evidence & Testing, Governance, Schedule, and Timeline.
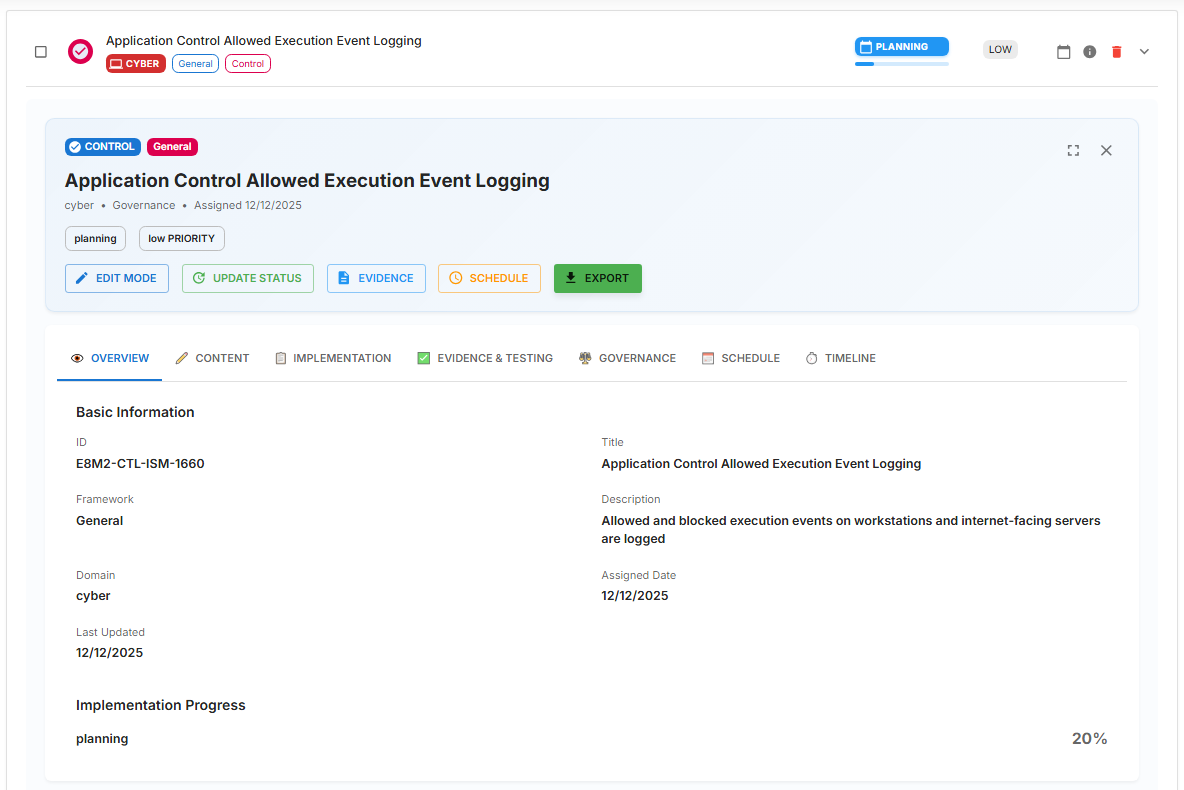
Overview: The overview tab provides basic information about the Control, including ID, Framework, Domain, Last Updated, Title, Description and Assigned Date.

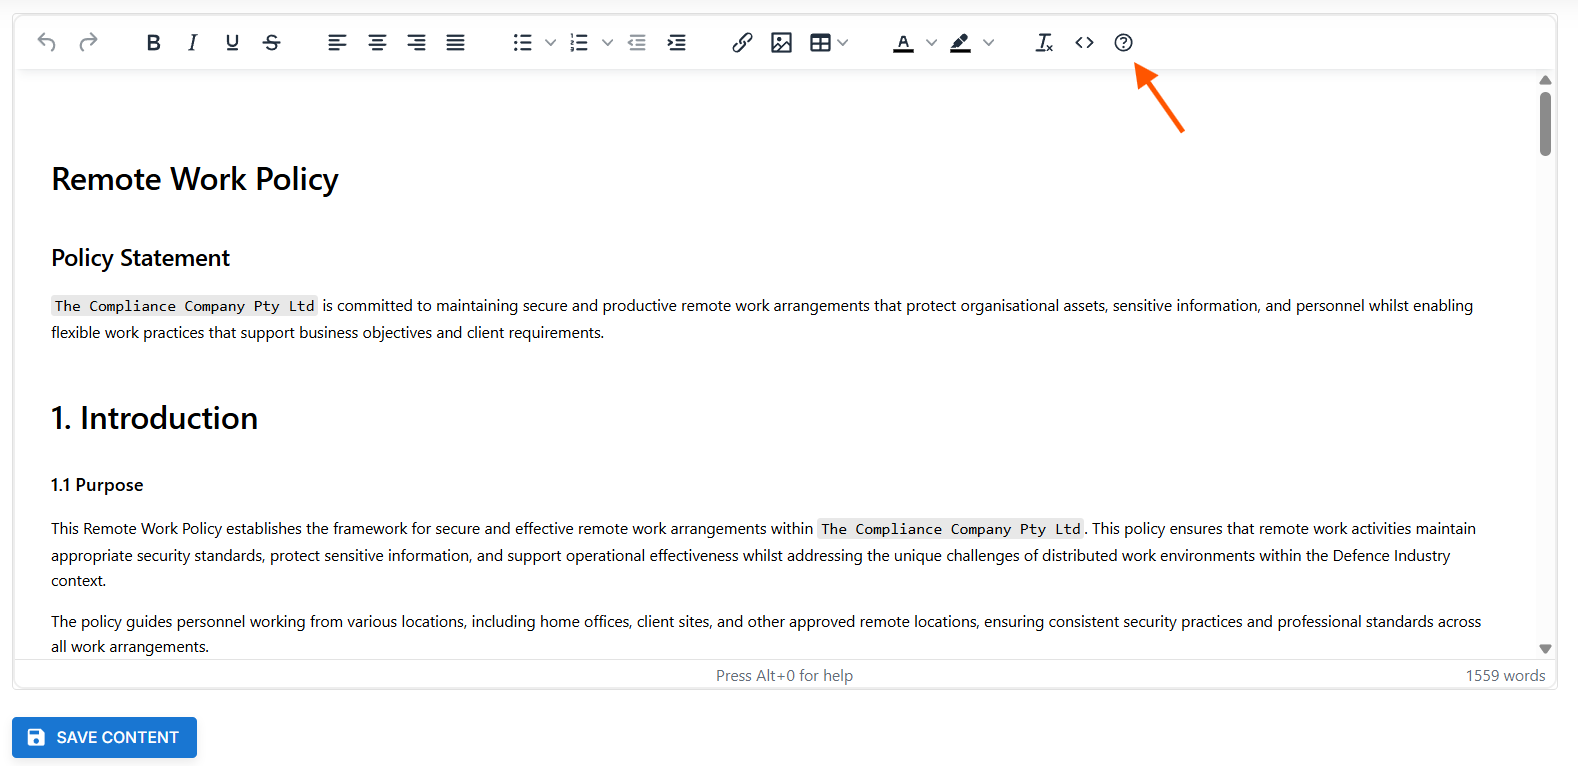
Content: The Content tab allows DISPulse users to store and edit their controls in a single, secure platform. In view mode, users can review Control content. To edit Control content, users must click the Edit Mode button in the Control cards header. Once edit mode is toggled on, users can edit the Control title, description, and body content.
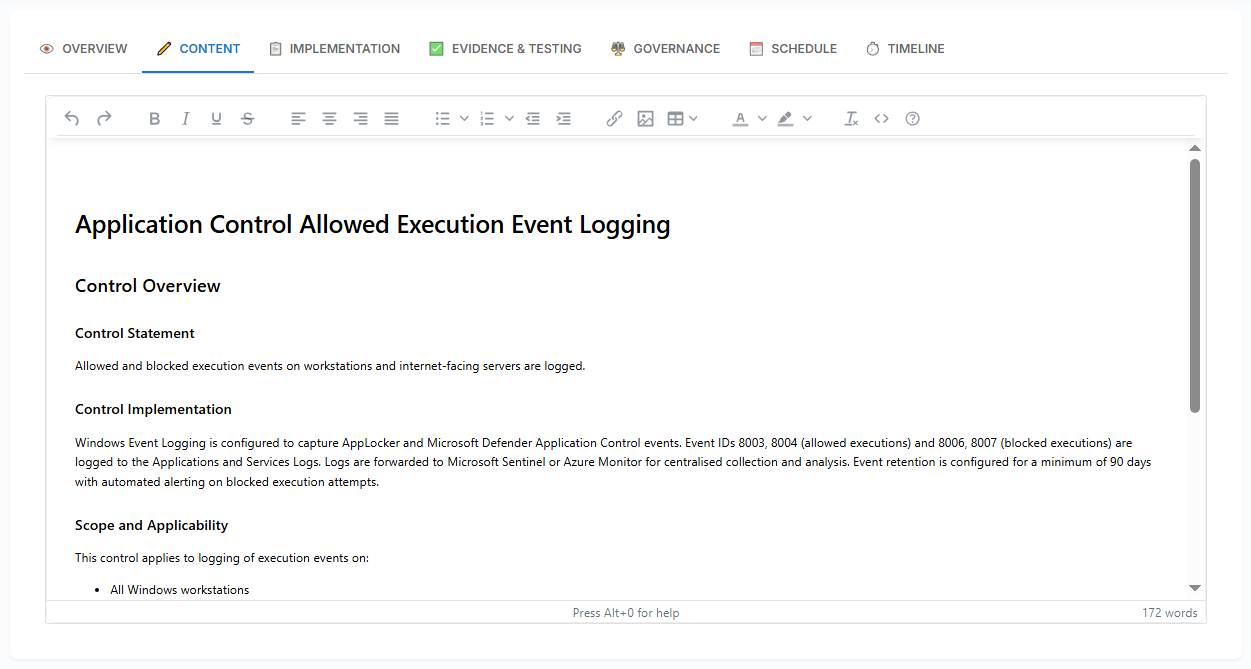
It's essential for document exporting that content developed and edited in DISPulse is well-formatted. Learn how to access and use all the features of the content editor by clicking the question mark icon in the body content header, or press Alt+0 for help.
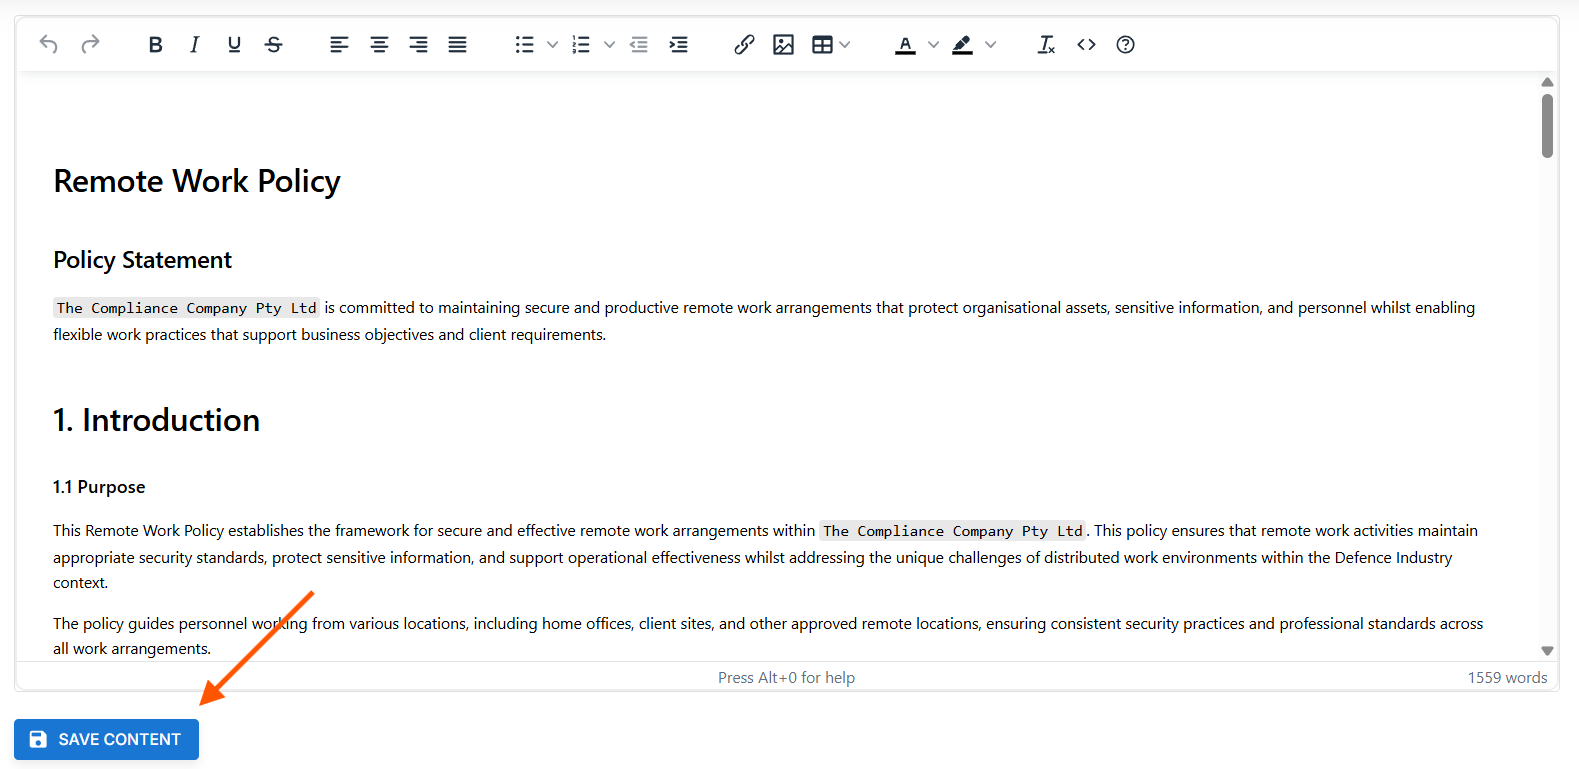
To save any changes, click the Save Content button in the bottom left-hand corner of the content tab. To discard any changes, click the edit mode button again. If your document is formatted correctly, you can also export straight to a Word document by clicking the export button in the Control card header.
Implementation: The implementation tab lets users track, organise, and manage Control implementation.

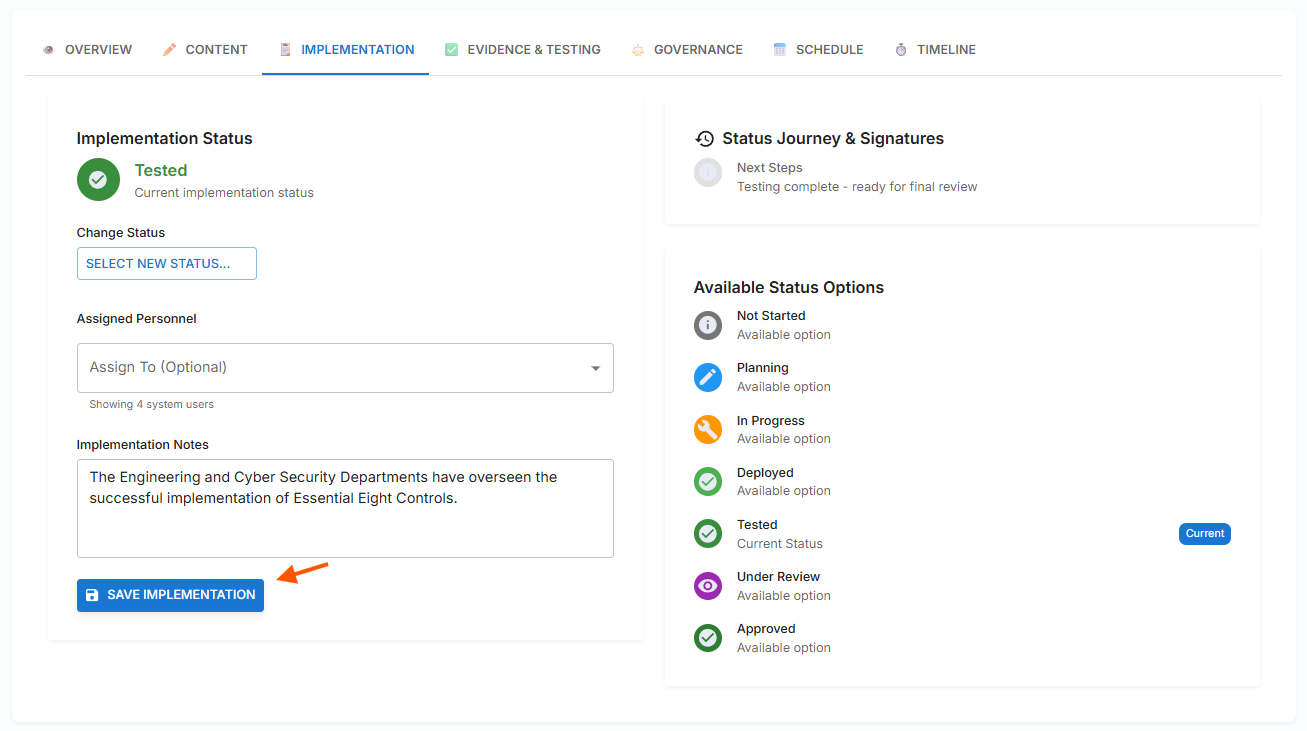
Users can move controls through 7 implementation status options: Not Started, Planning, In Progress, Deployed, Tested, Under Review, and Approved. To progress through the implementation stages, click the Select New Status button and choose the status from the dropdown list that best matches your current implementation state. Then users can optionally assign the Control to a DISPulse user with system access (Personnel who haven't been given a DISPulse account will not appear in the Assign Personnel dropdown menu), add implementation notes, progress updates, or relevant details. Note that for each change in implementation status, the implementation notes can be updated; the previous notes will be saved in the timeline entry.
Once you're ready to change the Control implementation status, click the Save Implementation button. Once saved, either refresh your browser or click the update status button in the Control card header.
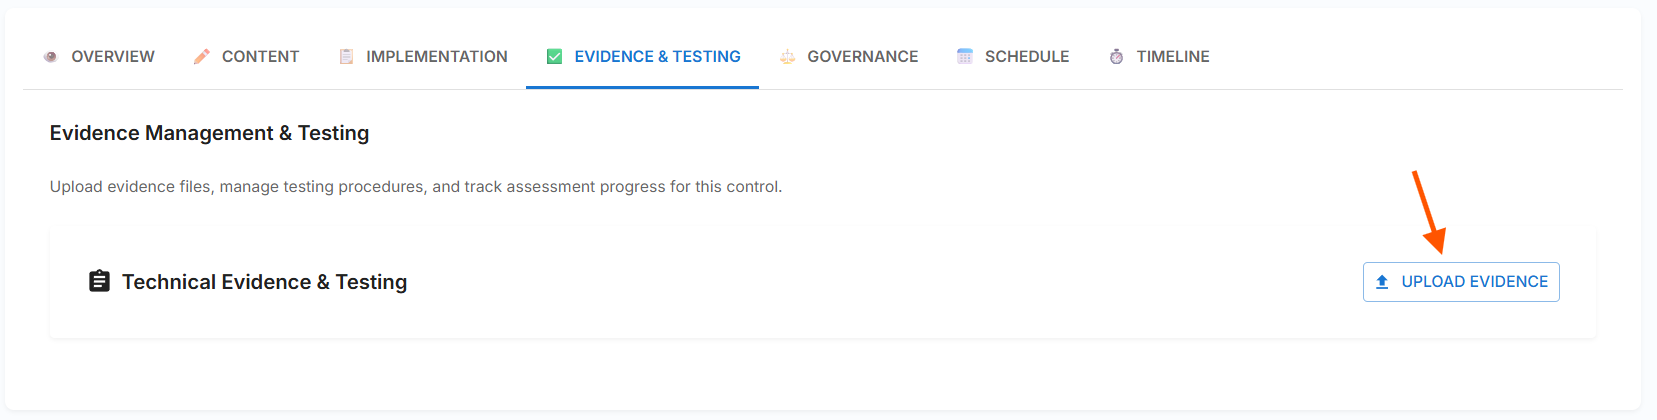
Evidence & Testing: The Evidence & Testing tab is where evidence is saved and attached to specific controls. Saving evidence in the specific control rather than just in the evidence locker enables DISPulse to generate reports more accurately and access your compliance status.
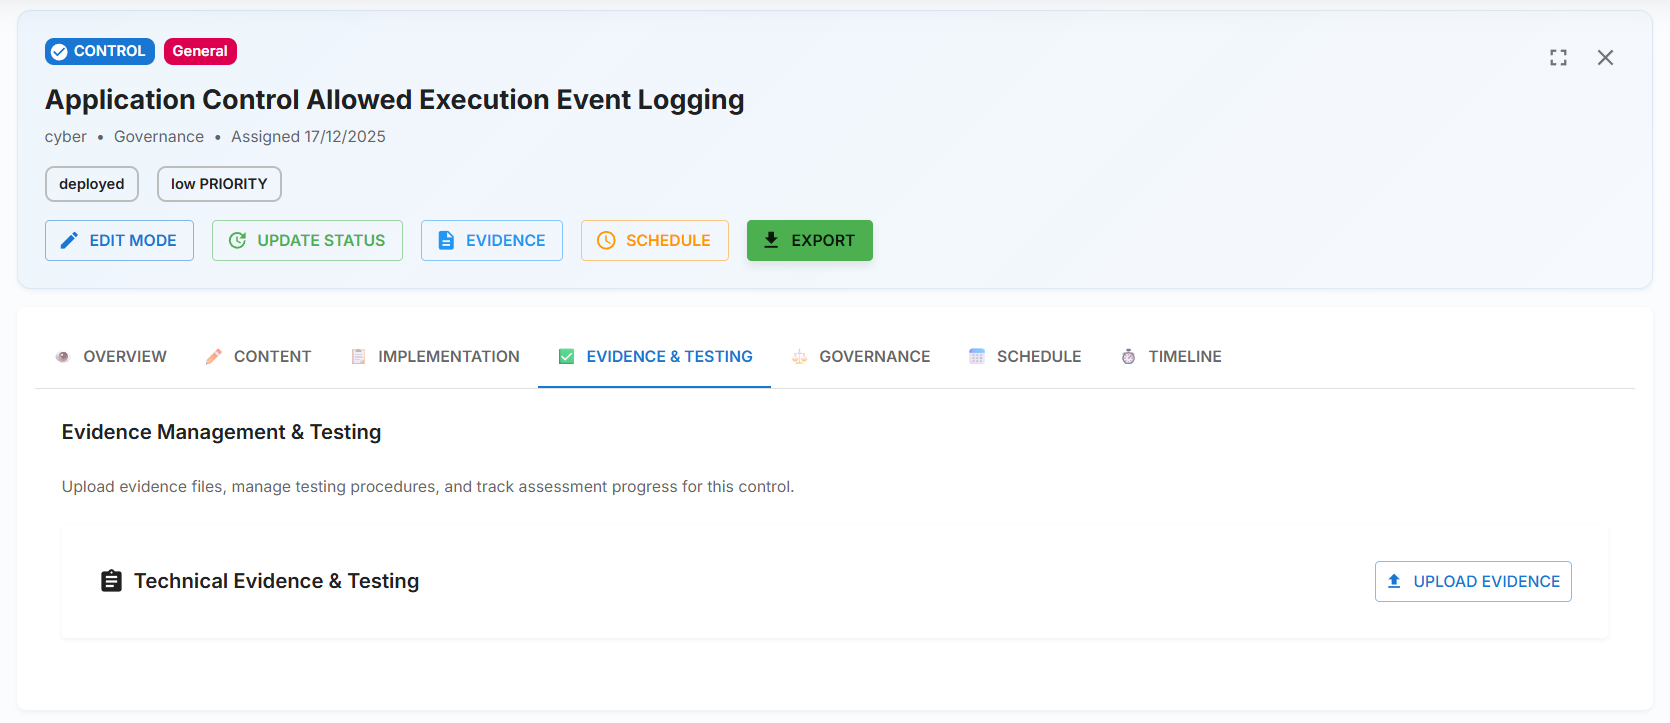
To upload evidence in the Evidence & Testing tab, click the Add Evidence button to open the evidence upload form. In the Upload Evidence form, write a brief description of the upload and then click Select Files To Upload. Once done, click Upload (the number of files you're uploading). Files to upload your evidence files and save them within DISPulse.
Governance: The Purpose of the governance tab is to fulfil the CSO's responsibilities for implementing security standards in the organisation and participating in security compliance processes.
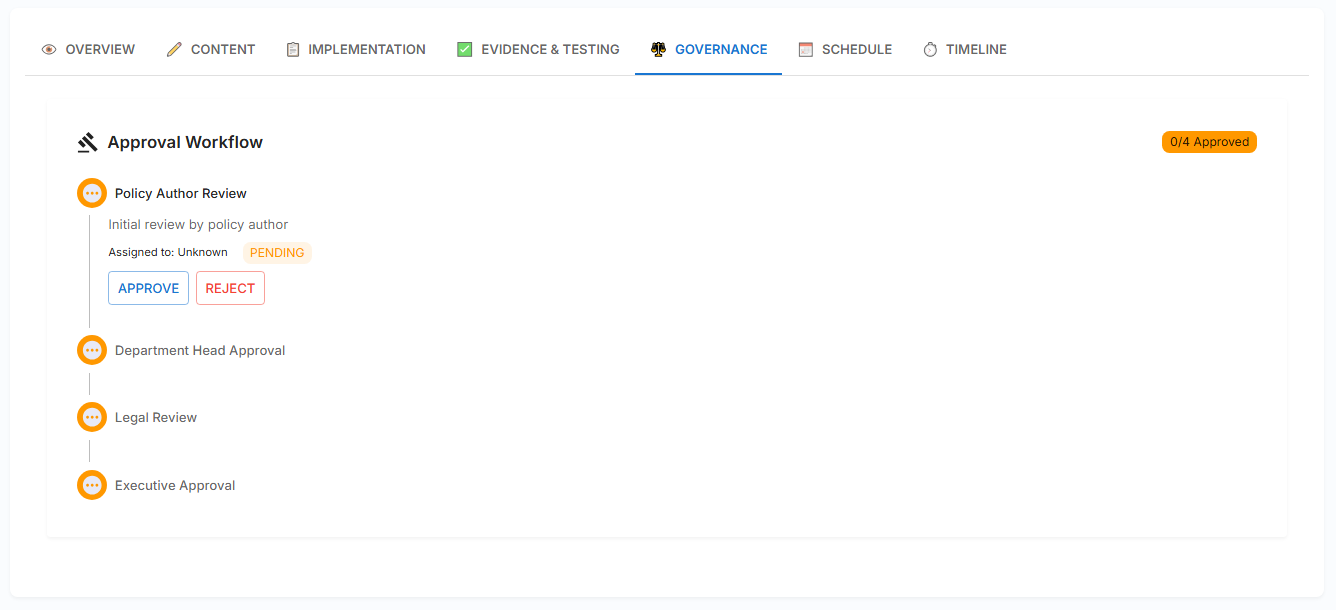
From the governance tab, multiple parties can approve changes and Control implementations. Once each stage is approved, users can submit the Control to the CSO for review. CSOs can finish the approval workflow from the CSO dashboard.

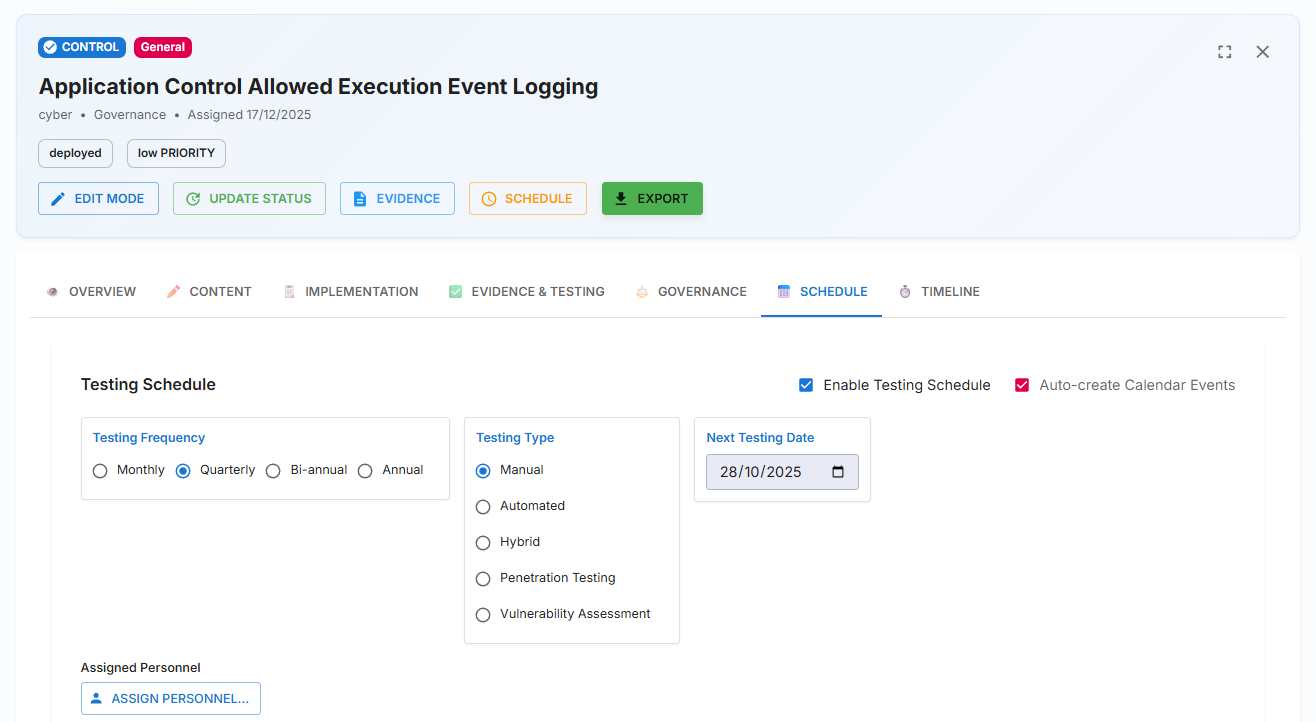
Schedule: From the schedule tab, users can manage the testing, assessment, and review frequency and assign personnel. To set or change a Control review schedule, first select the enable schedule checkbox and, if desired, the Auto-create Calendar Events checkbox, then select the desired frequency from the options: Monthly, Quarterly, Biannual, or Annual. Once you've chosen the frequency, set the next review date, and, where applicable, select the testing and assessment type, the review cycle will begin on the date you specify here. Then, if desired, assign a user to the Control review (note: you can assign anyone from the personnel register). Finally, click Save Review Schedule to save the review schedule and create compliance events in the compliance calendar.
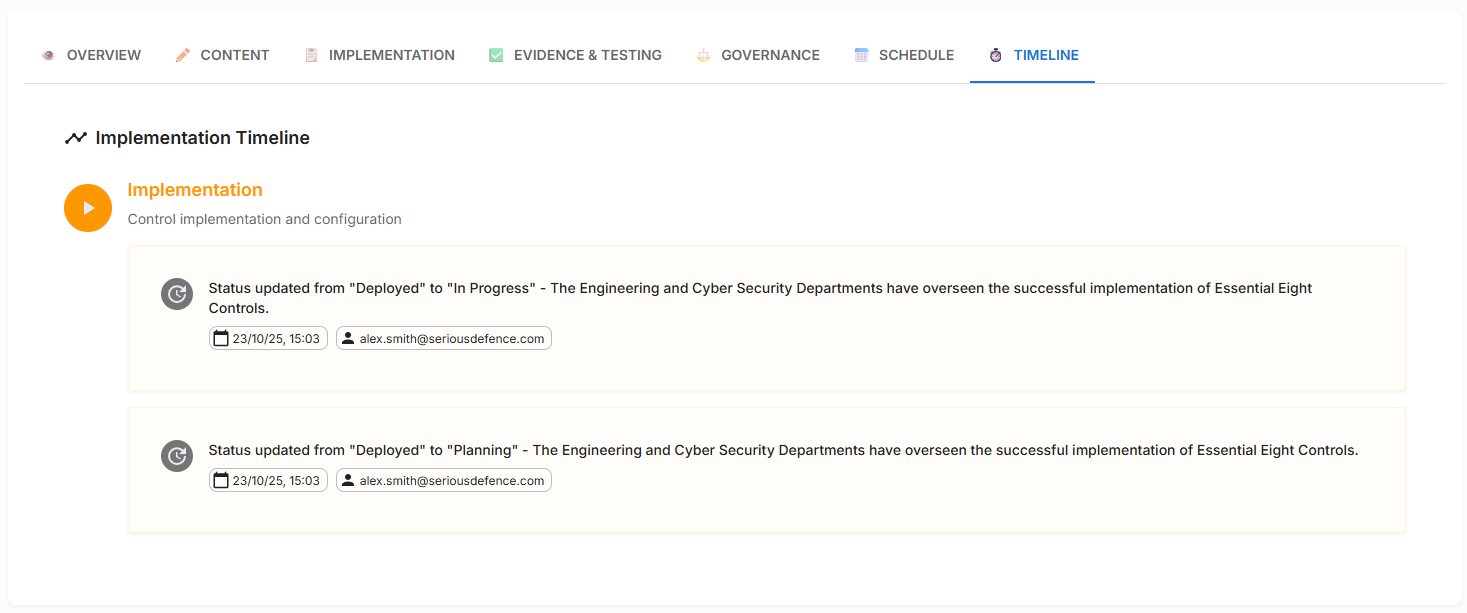
Timeline: The timeline tab records all implementation updates for a Control created in DISPulse. Timeline entries cannot be edited or deleted in DISPulse.