Organisation Settings
Configure business details, locations, security personnel, and system settings.
Getting Started - Managing your Organisational Settings
The Organisational Settings page is where you manage several organisation-wide settings and information, such as business details, locations, and security personnel.
To find the organisational setting, users need to first navigate to it. The Organisation Settings page is located under the Administration tab in the navigation bar.
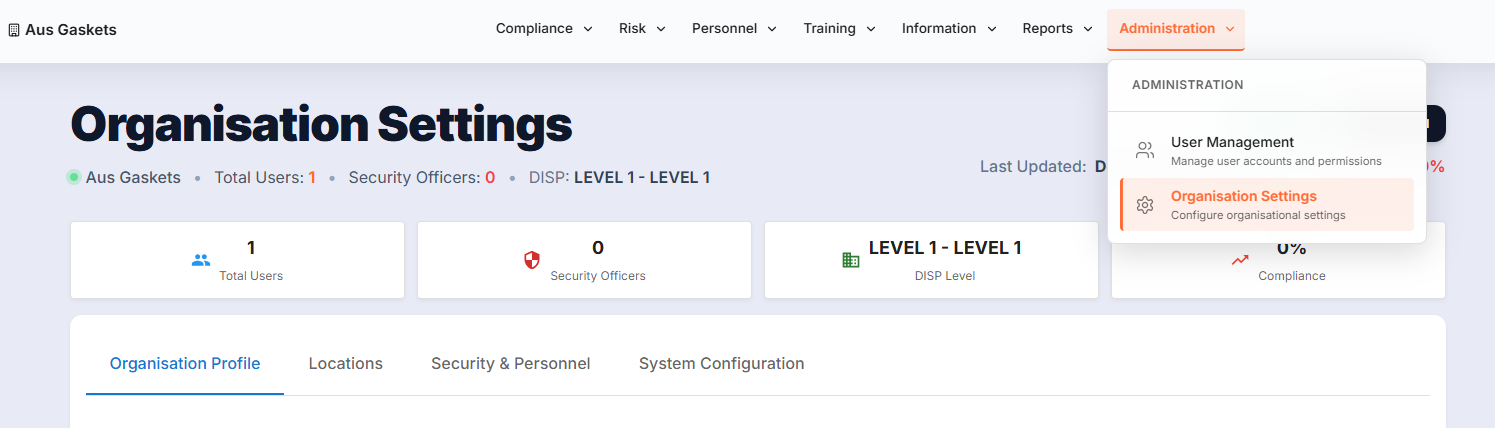
The Organisation Settings contain settings and details that affect the entire organisation and how users interact with and use different DISPulse features. At the top of the Organisation settings page, users can see the total number of users and security officers in their organisation, their DISP level, and their compliance rate. Organisation Settings also has four tabs: Organisation Profile, Locations, Security & Personnel, and System Configuration.
Organisation Profile
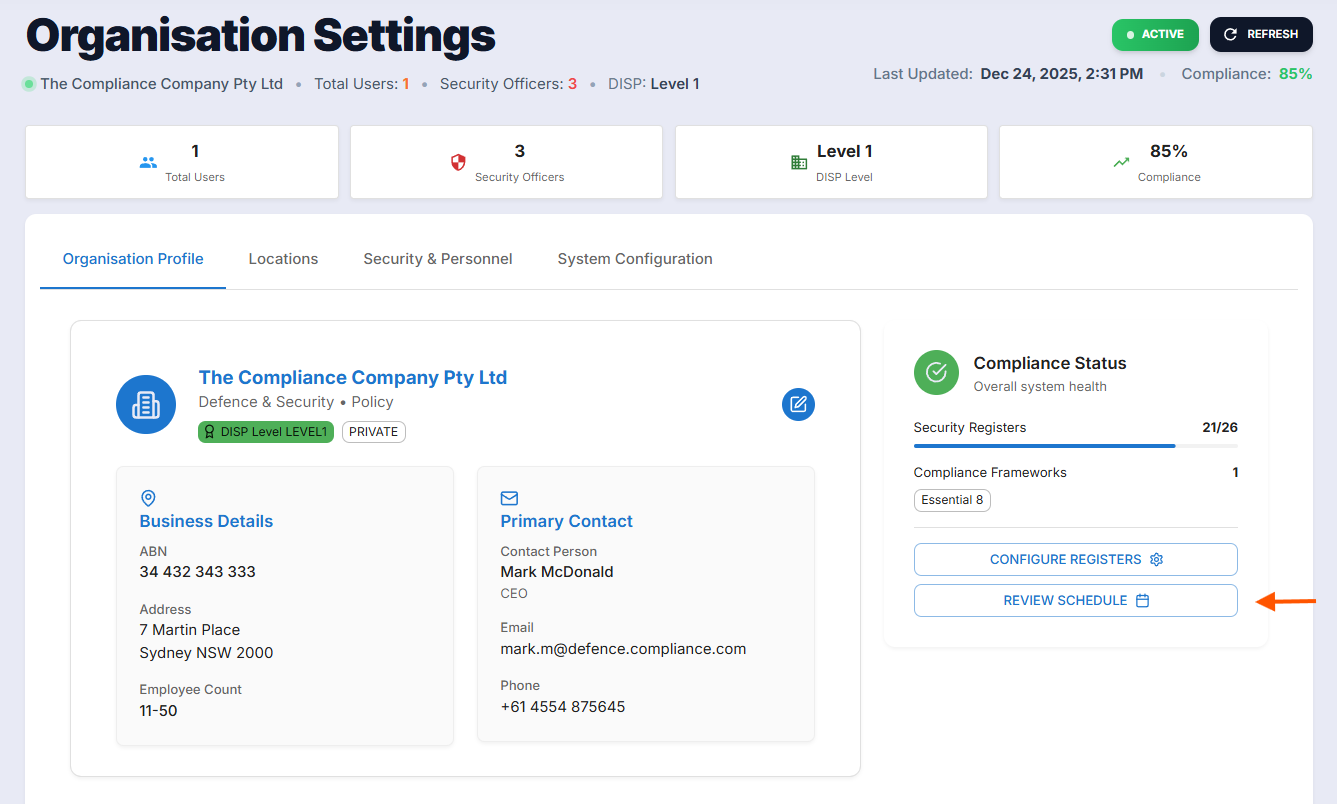
The Organisation Profile tab contains the organisation's Business and primary contact details, as well as security register configuration and review settings. To update or add business and/or primary contact details, click the edit icon in the top-left of the organisation information section.

In the organisation information form, users can update or add basic organisational information, Industry information, primary contact details, Registered address, and compliance & security details. Once you've finished making changes and wish to exit, click the Save Changes button to save any changes you've made to organisation information or click Cancel to exit the form without saving.

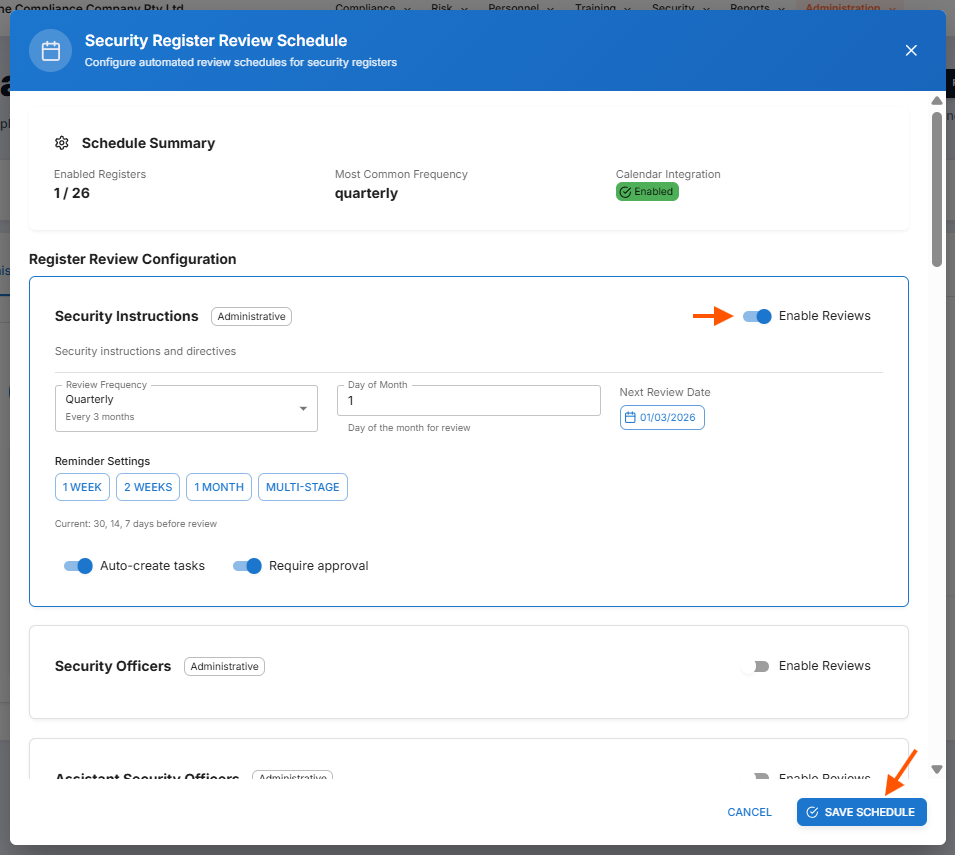
To manage security register review schedules, click the review schedule button under security register settings on the right-hand side of the screen. Once you've clicked the button, the Security Register Review Schedule form opens. From here, you can turn Calendar events on or off, set security and register reminders. To get started and enable a review schedule for a security register. Select the Enable Reviews button next to the security register you want to review.

This will open the security registers review configuration card. On this card, users can configure the review frequency, the day of the month when reviews occur, and the review lead time. Users can choose from weekly, 2-week, monthly, and multi-stage reminders, so you're never caught off guard by upcoming security events. Finally, users can enable task auto-creation and specify whether those tasks require approval.


In DISPulse, users can manage which security registers are in use based on their business needs. To manage which security registers are in use, users can click the Review Schedule button on the Organisation Profile tab in Organisation Settings.
Now that the Security Register Review Schedule form is open, users can browse the security register library and enable or disable registers as needed. To turn a security register on or off, select the toggle for each register; a blue toggle indicates the register is in use. To save any changes to the security register implementation, click Save Configuration before exiting the form. NOTE: Disabling a security register does not delete the security entries previously made for that register.
Locations
The Locations tab contains details of the locations an organisation has; from here, users can review, edit and add organisation locations. To review current locations, users can review the locations table, which lists each location, its name, type, address, security, and status. To edit a location, click the pencil icon under the actions column for the location you wish to edit. Once done, users can update the location's basic information, including its address and security status.


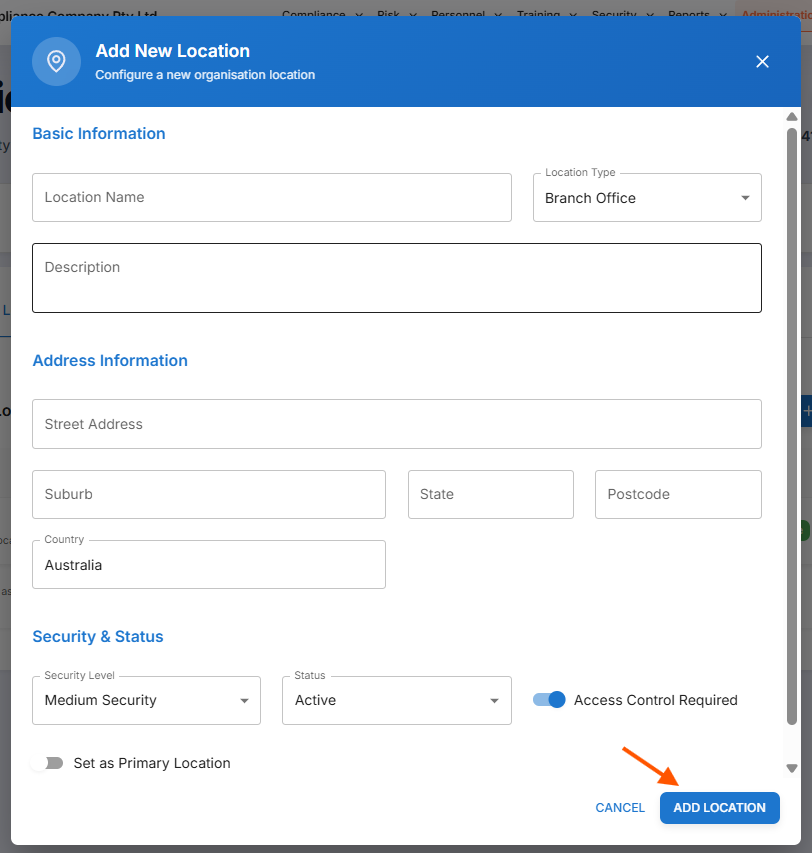
To add a new location, click the Add Location button. Once done, the Add New Location form will open. In the Add New Location form, fill out all fields with the relevant information for the location you wish to add. Once done, click add location to save your work and add the location into the system.
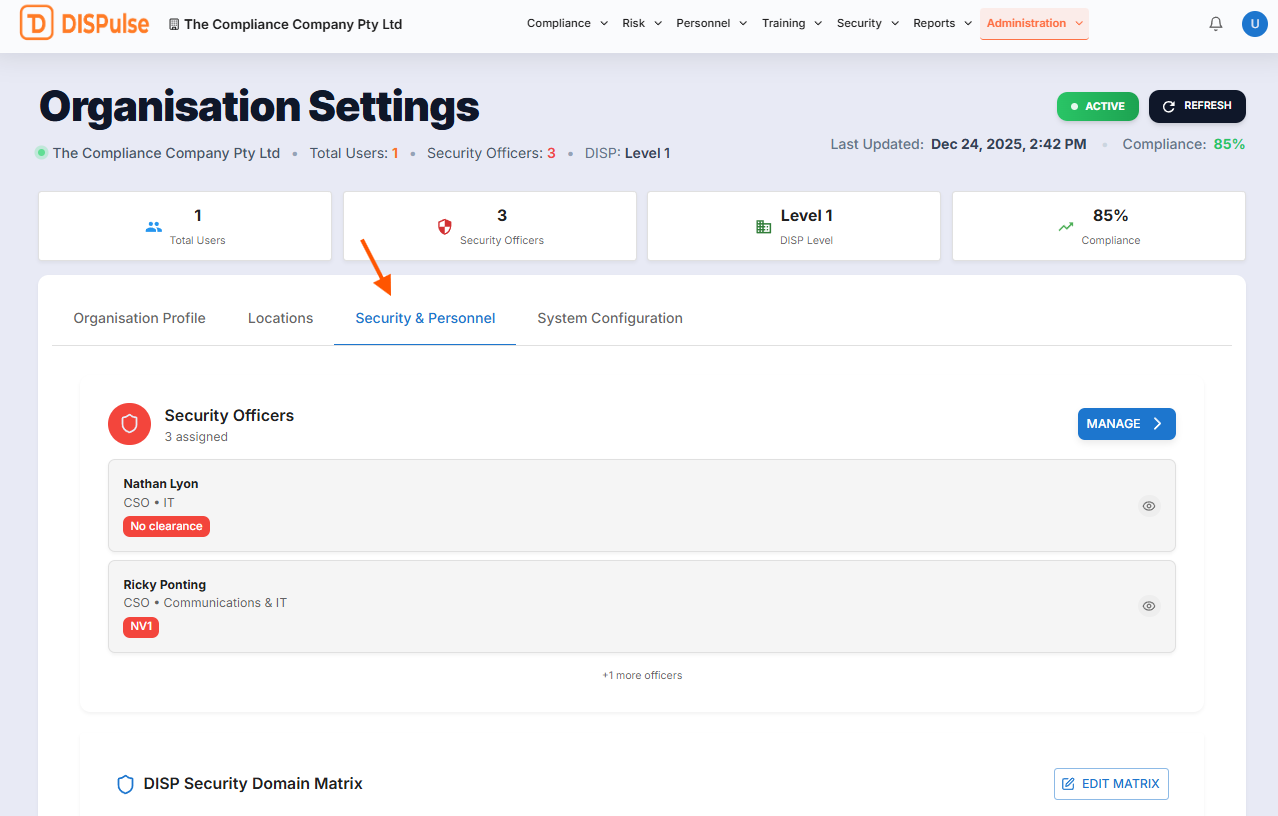
Security & Personnel
The Security & Personnel Tab allows users to manage their security personnel and DISP level classifications. The security officers section manages and reviews security and chief security officers in DISPulse. To view, add and manage all security officers, click the manage button.
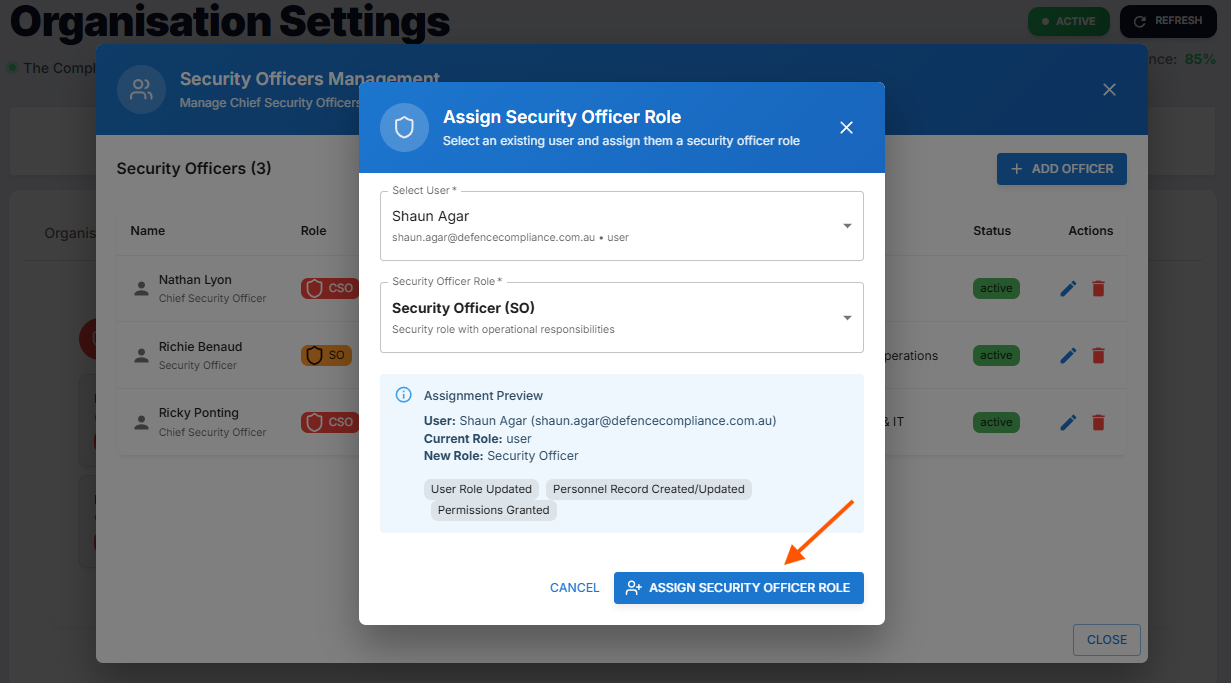
From this card, users can review, edit, and manage security officers in DISPulse. To add a security officer, click the Add Officer button in the top right of the card. This opens the Assign Security Officer Role form, where users select a system user to assign as an SO or CSO. If you haven't given any of your security personnel system access yet, see the Getting started - Adding your First User user guide to learn how to grant system access to your desired personnel. Once you've selected a user and a security officer role, click Assign Security Officer Role to confirm the assignment.
To edit any of the details of the security officer or Chief security officer you've just assigned, click the pencil icon under the column tab for the officer you wish to edit. This will open a form where you can edit personnel, professional, employment, security and emergency contact details. To save your changes, click Next until you reach the last page, then click Update Security Officer.

To delete a security officer, click the red trash icon under actions, but be careful, this action cannot be undone.
At the bottom of the Security & Personnel tab, users will find a DISP security Domain Matrix. To edit or update your organisation's DISP level, click the edit matric button and select the domain levels that apply to your organisation. Once finished, click Save to save any changes you've made to the DISP security domain matrix.
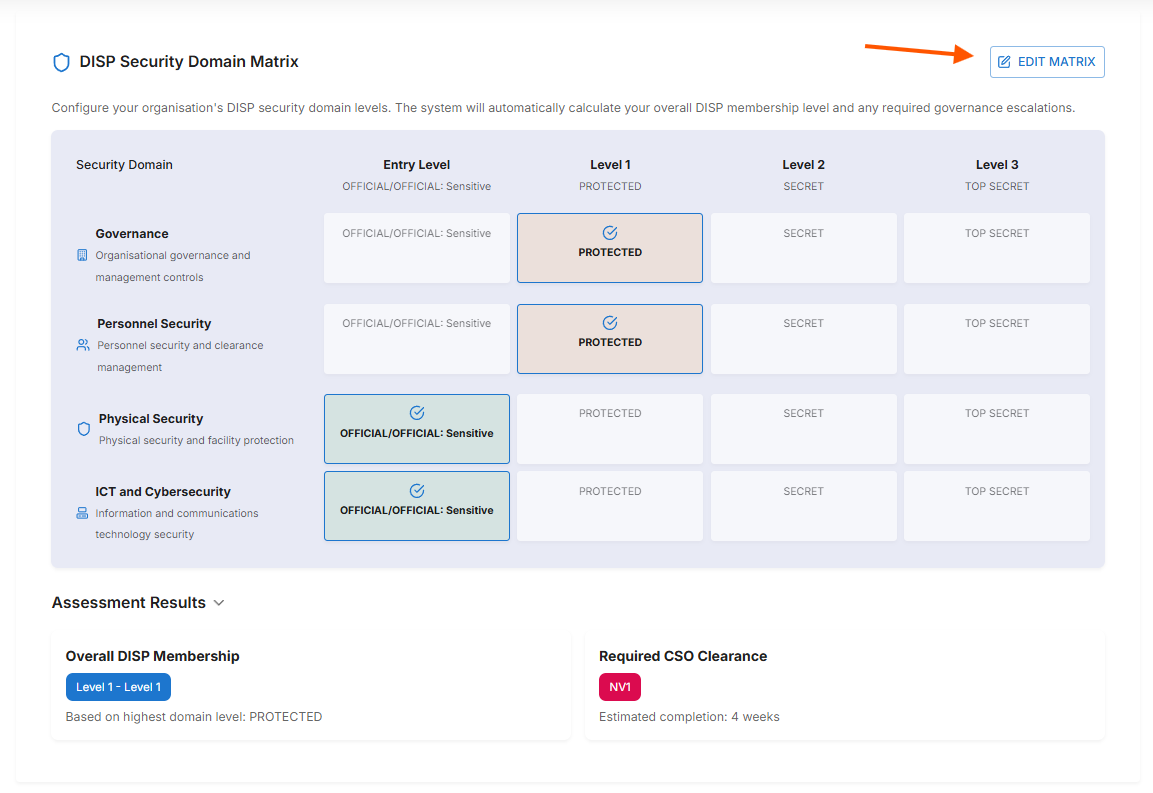
Image 17
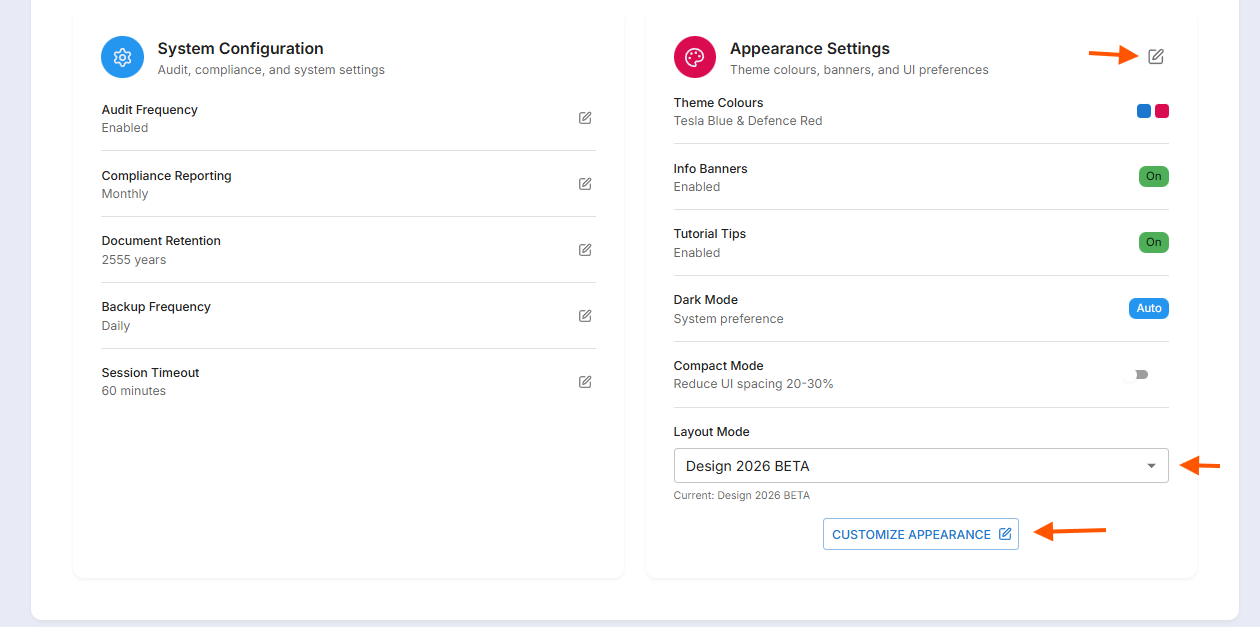
System Configuration
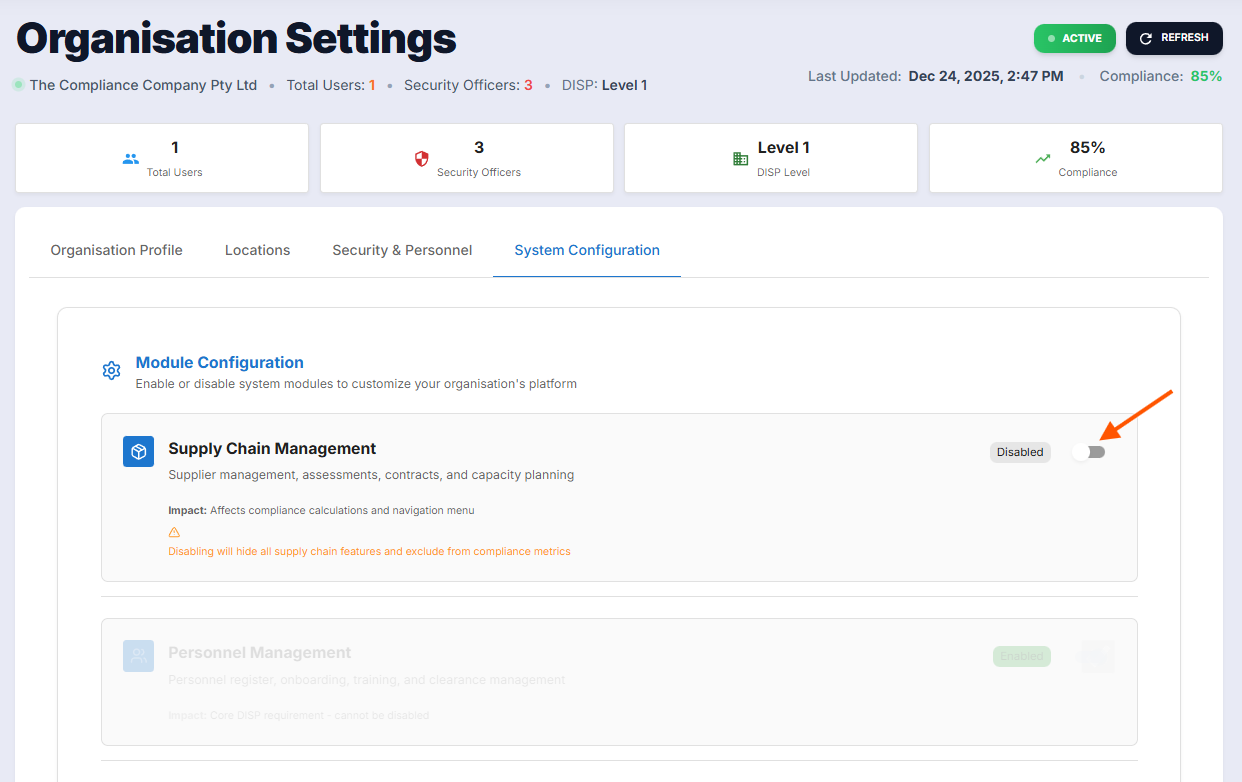
The System Configuration tab is where system admins and users with sufficient access can update system themes and accessibility settings, and Configure optional modules, such as supply chain management, if included in your plan.

To configure which modules are available in DISPulse, toggle the buttons next to the modules you want to enable in the module configuration section. To implement the changes, refresh your browser.
To update system themes and accessibility settings, open Appearance settings by clicking the edit icon, the Customise Appearance button, or selecting a layout mode from the drop-down list below. To apply accessibility and layout settings, users will need to refresh their browser.
Now you know how to use organisational settings, why not check out some of our other user guides to learn more and get the most out of the DISPulse?