Risk Dashboard
Identify, assess, and treat security risks across your organization.
Getting Started - Adding Your First Risk
Step 1. Managing risks has never been easier with DISPulse. To get started with adding your first risk in DISPulse, navigate to the Risk Dashboard.
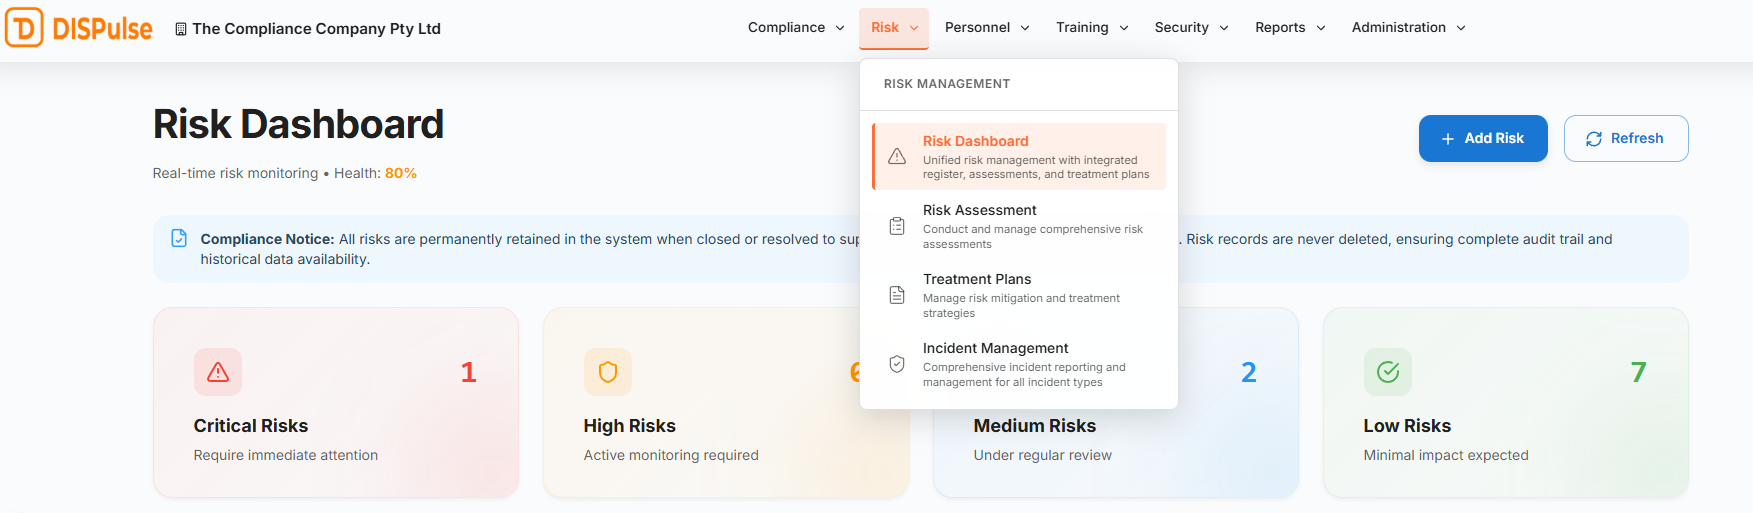
Step 2. To begin adding your first risk, click the ‘ADD RISK’ button in the top right-hand corner of the page to open the Add Risk from.

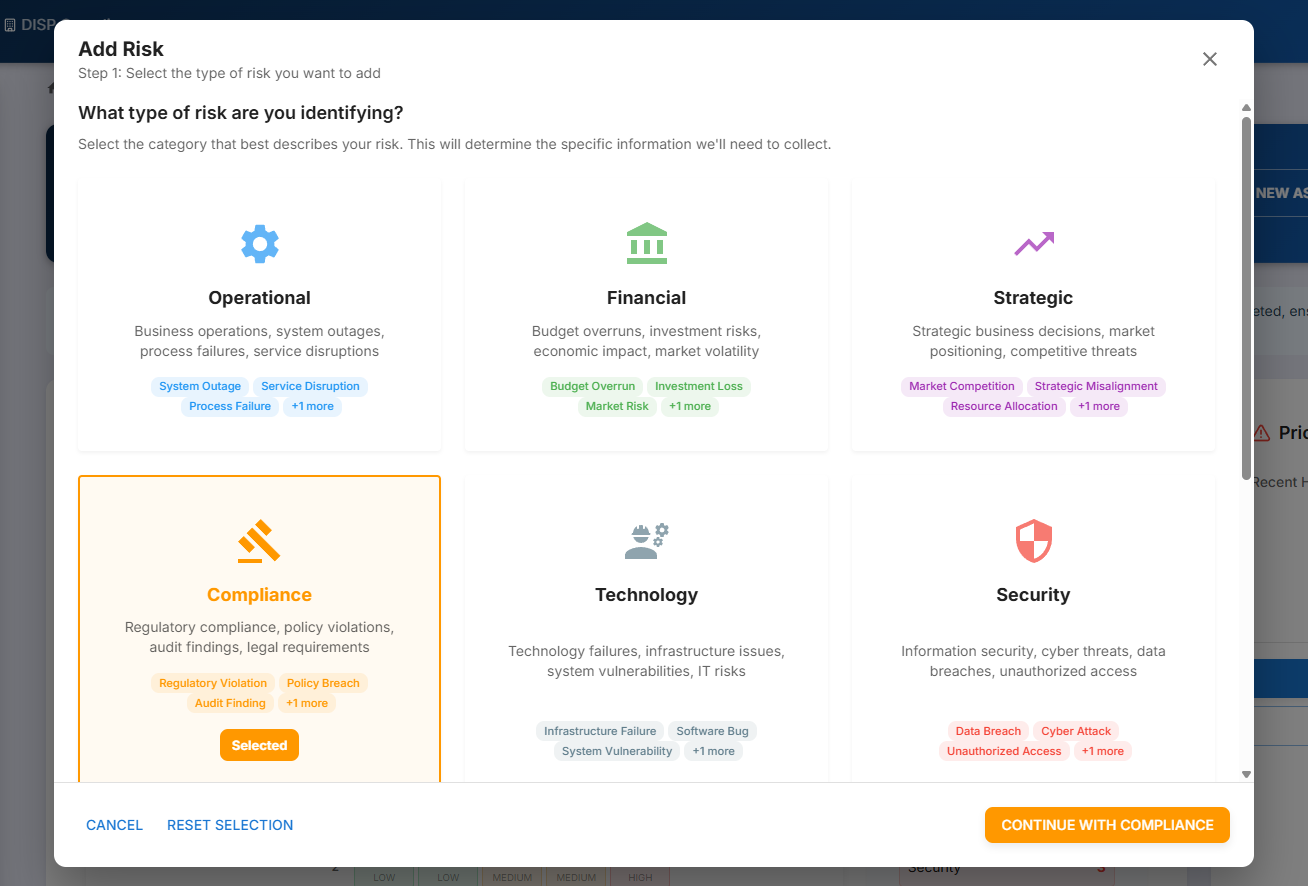
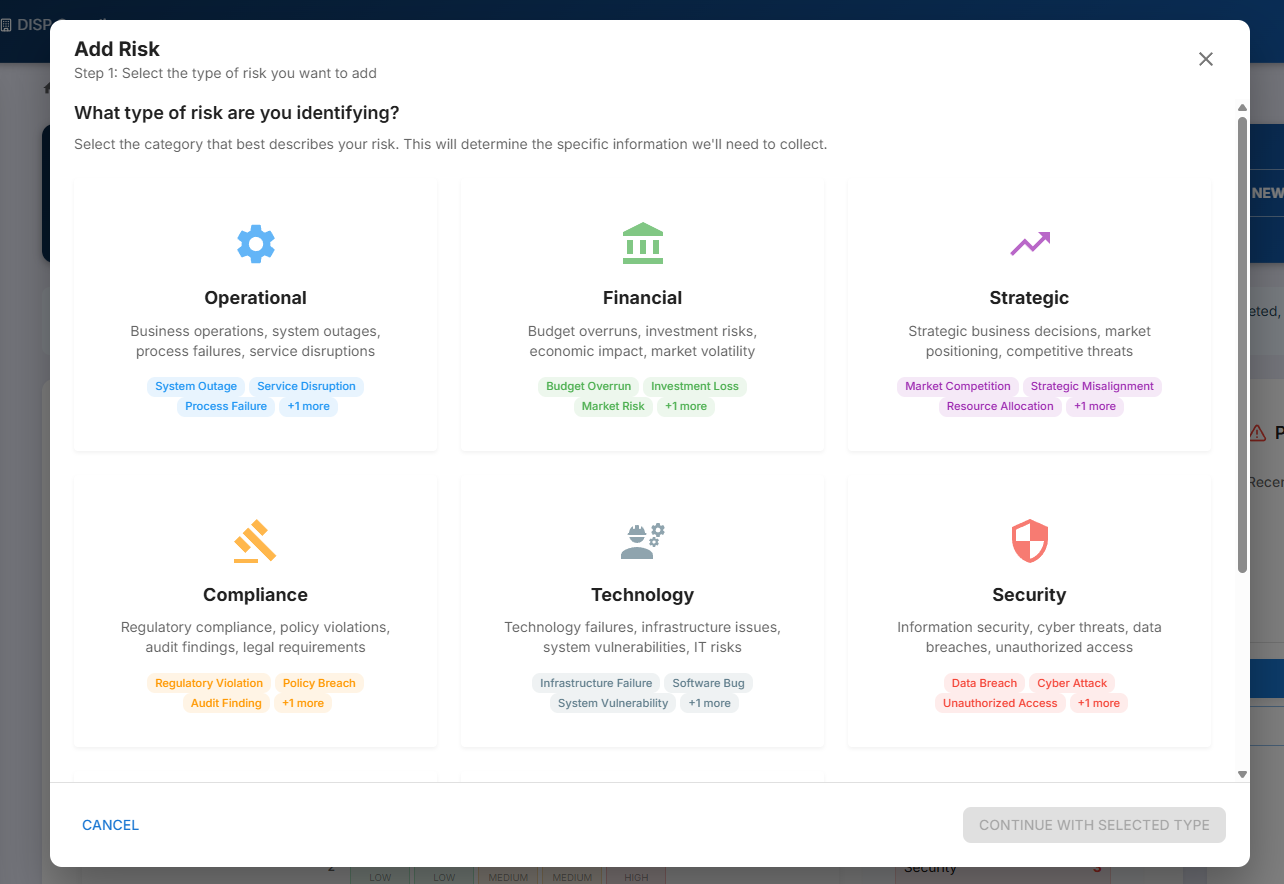
Step 3. Identify which risk category applies to the risk you wish to create. Once you’ve identified the risk category, select it and then click ‘CONTINUE WITH SELECTED TYPE’.
Step 4. Once you’ve selected the category, you’ll need to fill in the details of the risk you wish to create. Start from the beginning and ensure you capture all relevant information about the risk.
Step 5. Now that your risk has been added, scroll down to the bottom of the risk dashboard, where you’ll find your risk register. The risk register is a library of all the risks you've identified within DISPulse.
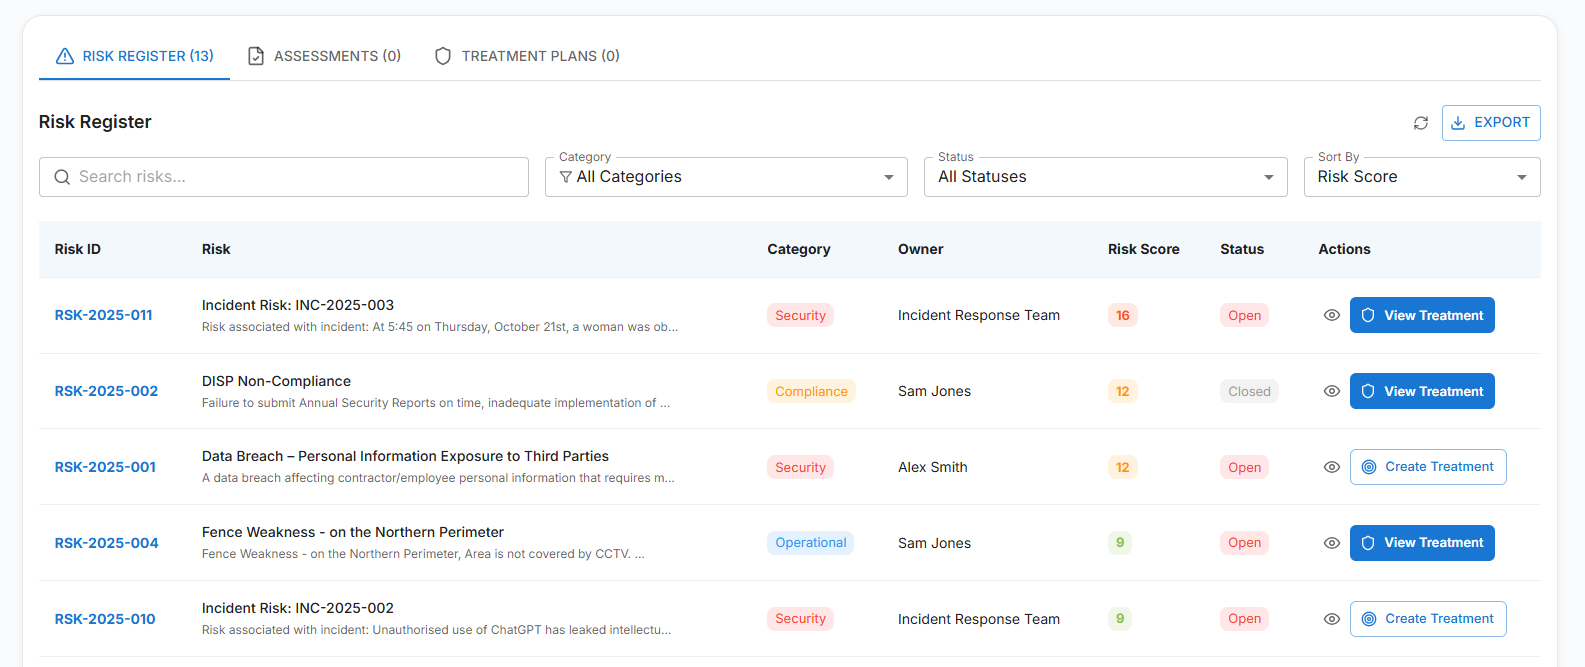
For each risk you create, there are two actions: View Risk Details and either View Treatment or Create Treatment, depending on whether a treatment plan exists for the risk. Actions are located in the Actions column on the far right of the Risk Register.
Step 6. Click on the eye Icon to view details and open the Risks detail card. From the risk details cards, users can review the risk, including its description, score, owner, assignee, status, identified date, next review date and current mitigations and controls. Confirm that all the details here are correct before moving on.
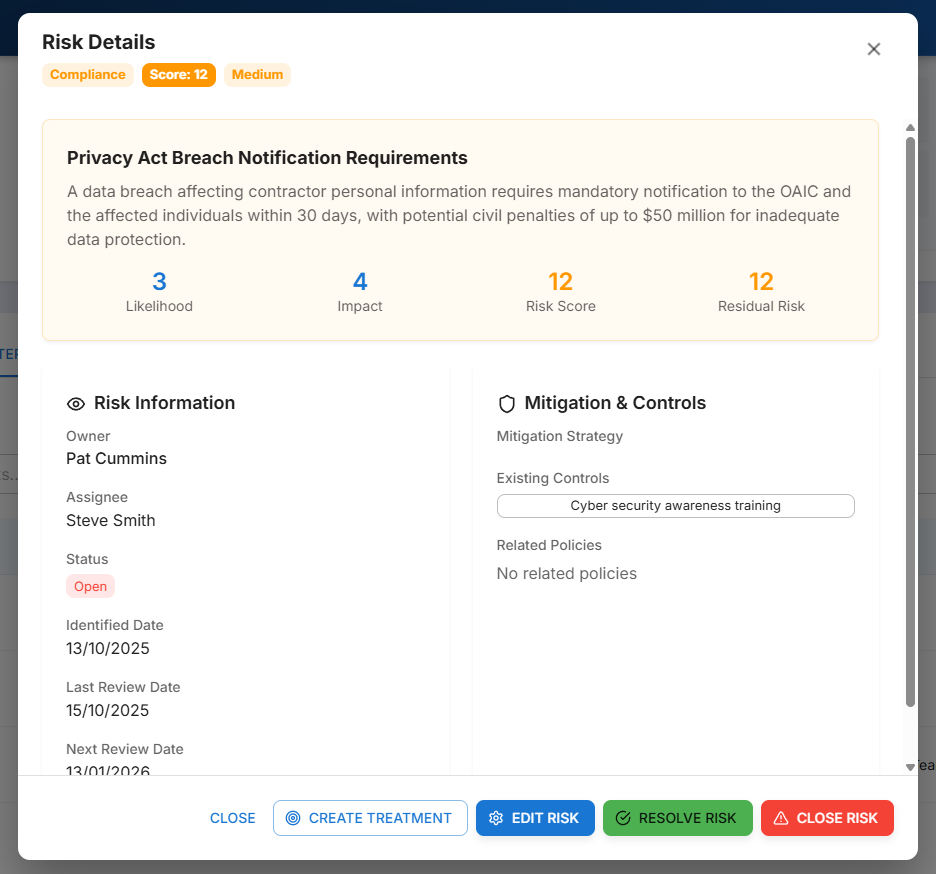
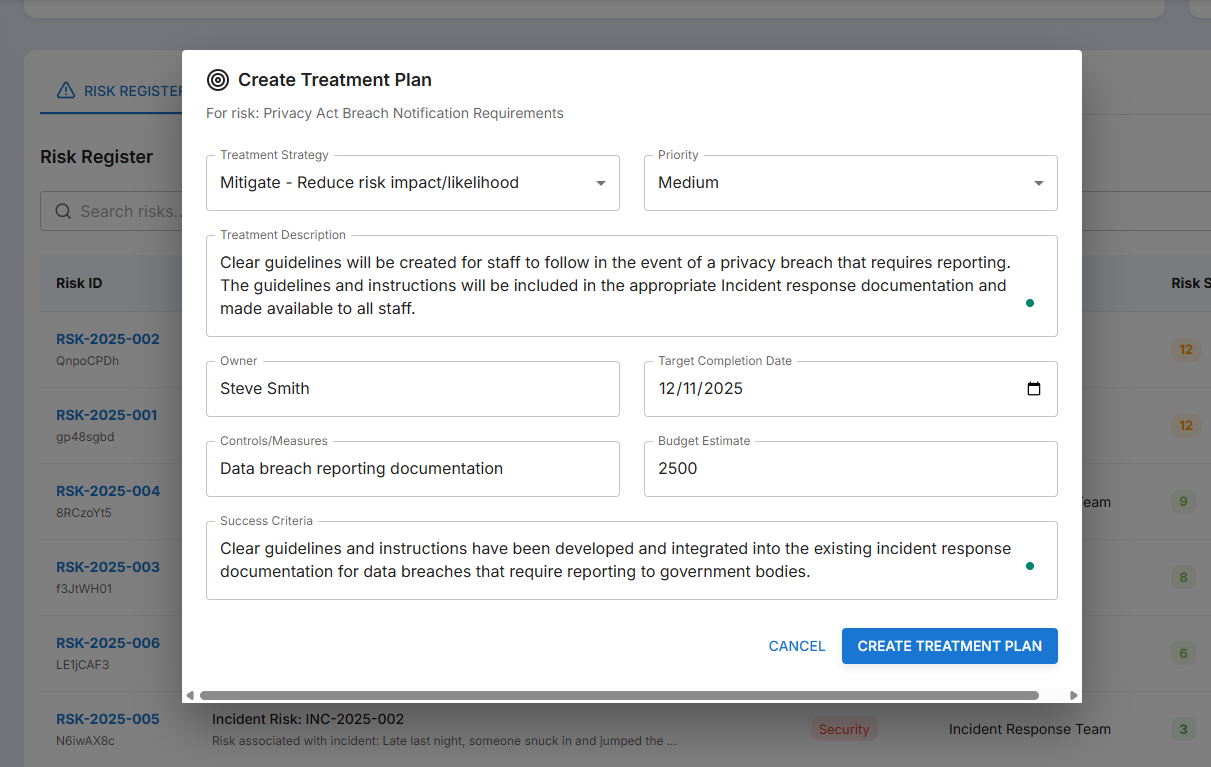
Step 7. Now we can apply any treatment, mitigation plans, or strategies you have in place for the risk we’ve just added. To do so, either click ‘Create Treatment’ in the ‘Actions’ column in the risk register for the risk you’ve just created or open the risk's details card and click ‘CREATE TREATMENT’ from the bottom of the card. Once done, a new form will open, allowing you to create a treatment plan for the risk you selected. You can confirm you selected the correct risk at the top of the form.
Provide all the details necessary for the treatment plan and then click ‘CREATE TREATMENT PLAN’.
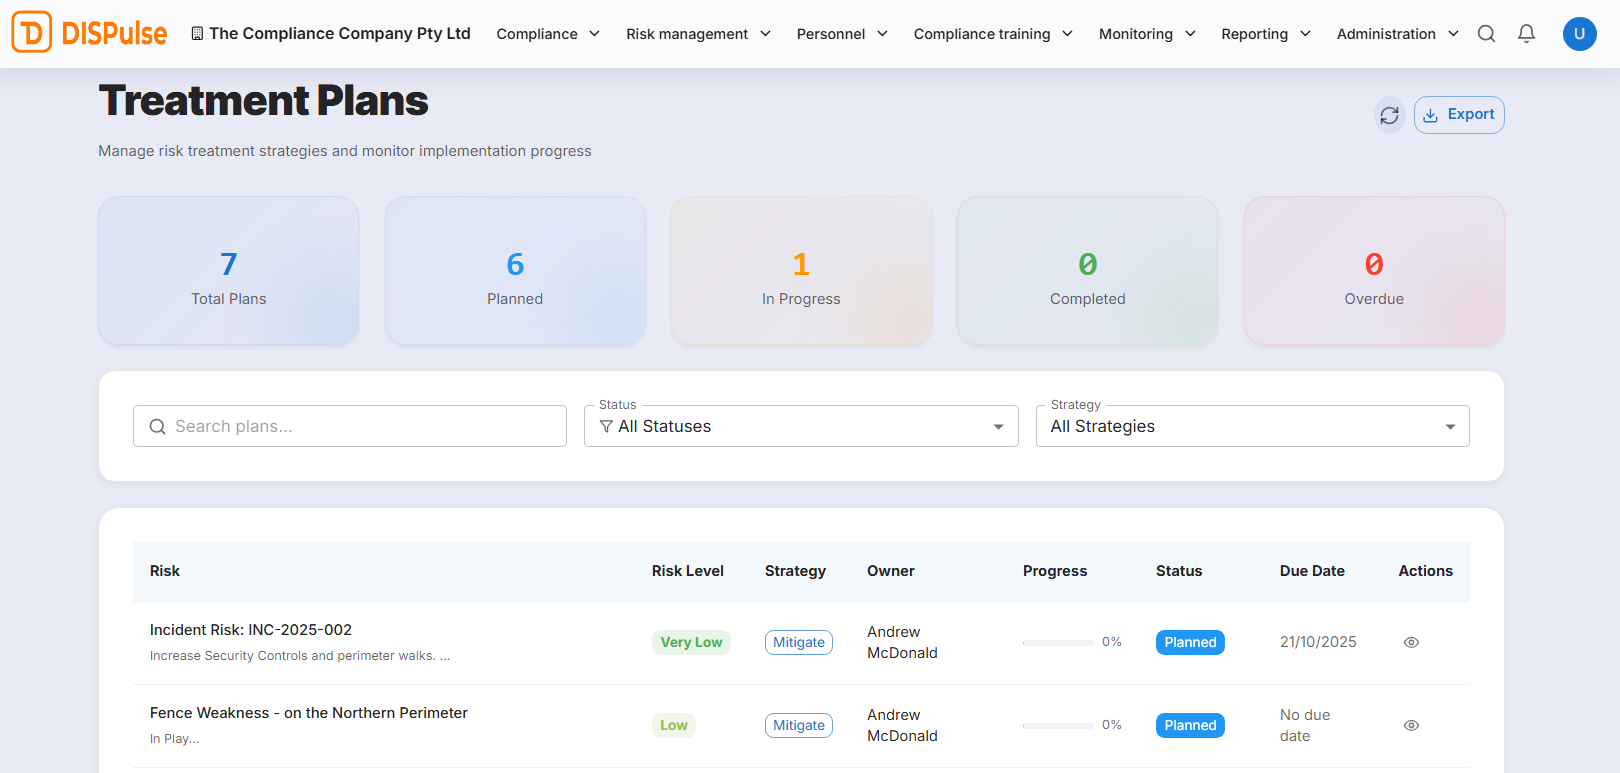
Step 8. To review the treatment plan you’ve just created, click 'View Treatment' in the actions column or navigate to the treatment plans tab in the risk register. Here you’ll see all the treatment plans you’ve created for your risks. If you’d like more information about the treatment plans or would like to manage them, click View All Plans.
By completing this guide, you will learn how to create and manage risks in DISPulse, including how to add treatment plans for newly added risks. To learn more about treatment plans and risk assessments, go to their respective user guides.